How to Repair & Convert Damage OST File
Step by step guide of how to repair & Recover OST file data using InQuit OST to PST Converter Software.
Download and Install InQuit OST to PST Converter.
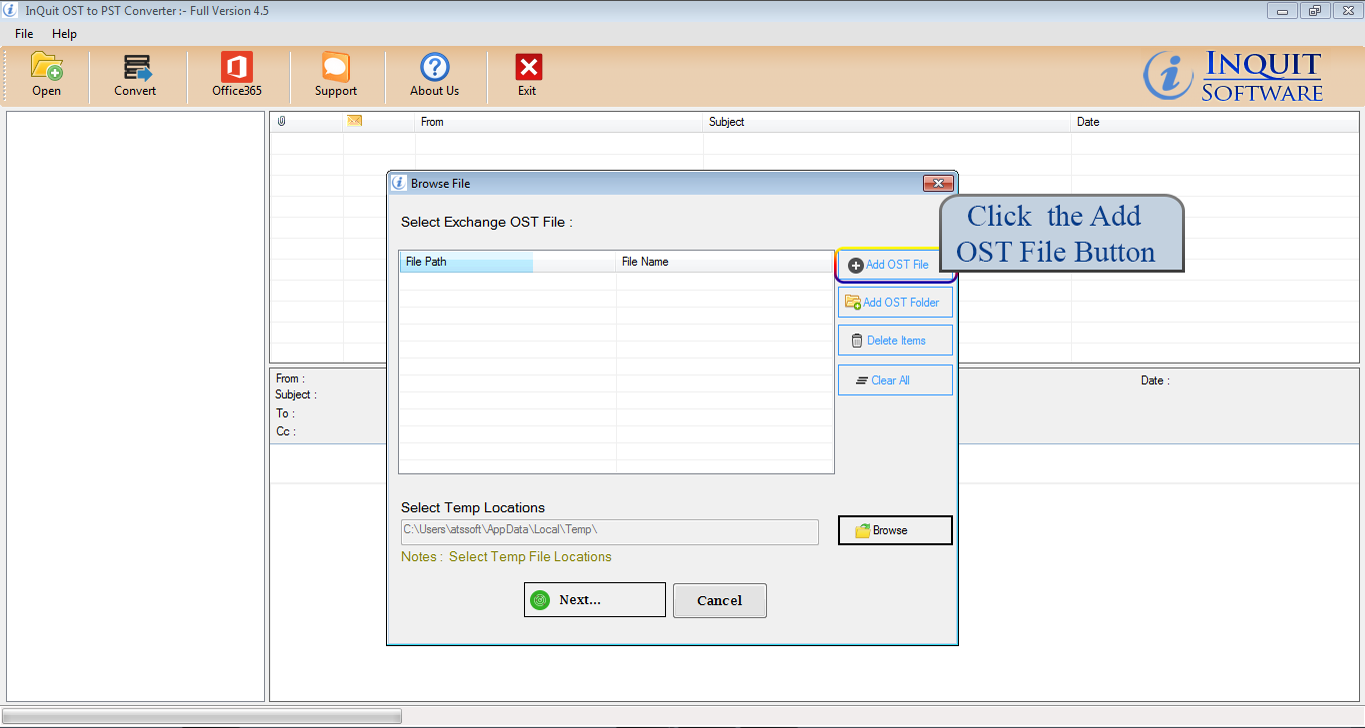
Click on the “Open” button

Two Option to Browse OST file(s).
Add OST File: To select corrupt OST file one by one.
Add OST Folder: To Select folder of OST files.
Display the preview of all OST emails including all items:
OST Items: Inbox, Outbox, Deleted items, Sent items, Calendar, Drafts, Contacts, Journal, Junk E-mail, Notes, Tasks etc.
Emails Meta Properties: To, Cc, Bcc, Subject, Date, Attachment, Embedded images, From, Date and Time etc.
You can also convert selected items only. Just select the emails or other items that you want to convert and proceed to the next step.
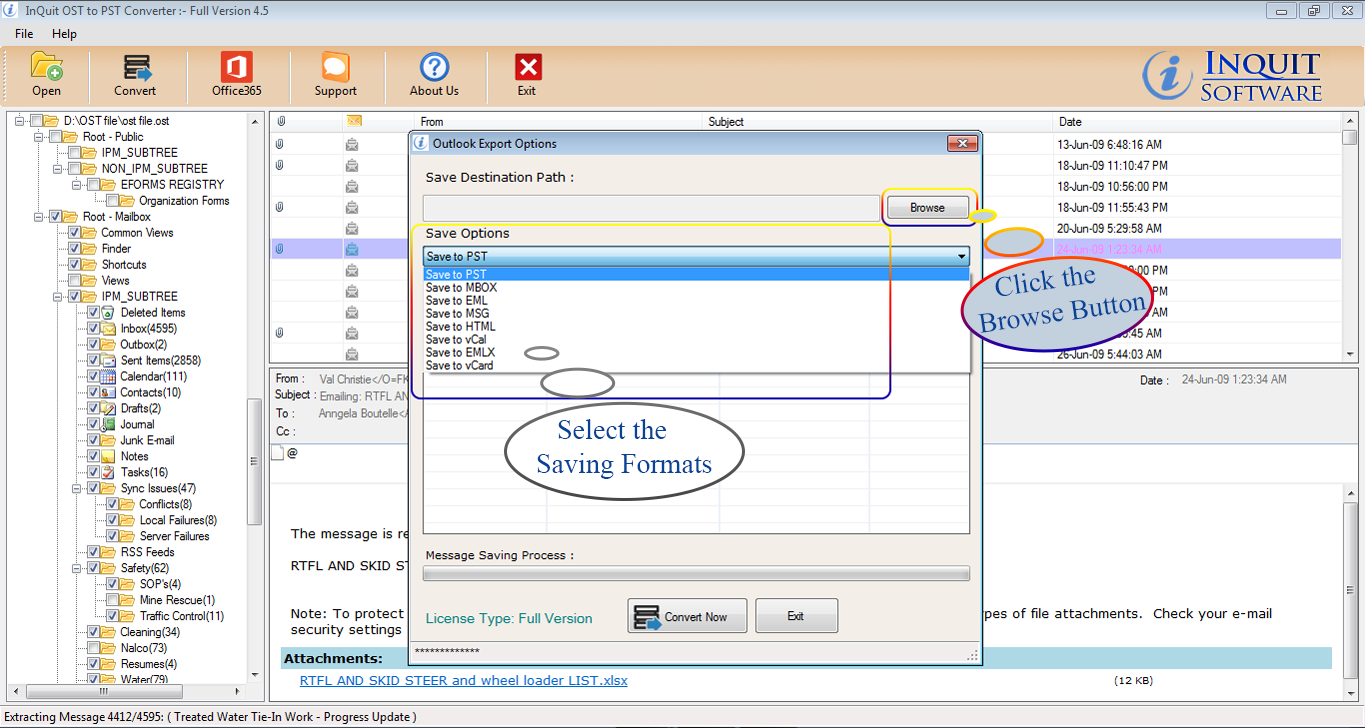
Click on “Convert” button from menu

Click on “Browse” button and select the Saving Destination path.
Many File Types: There are 8 file conversion options
- PST: → Export to Outlook PST
- EML: → Export to Windows Live Message
- EMLX: → Export to MAC EMLX Message
- MSG: → Export to Outlook Message
- HTML: → Export Message to HTML
- MBOX: → Export to MBOX Format
- VCF: → Export Contact to vCard
- ICS: → Export Calendar to ICS (vCal)
Select PST as Convert option for Microsoft Outlook.
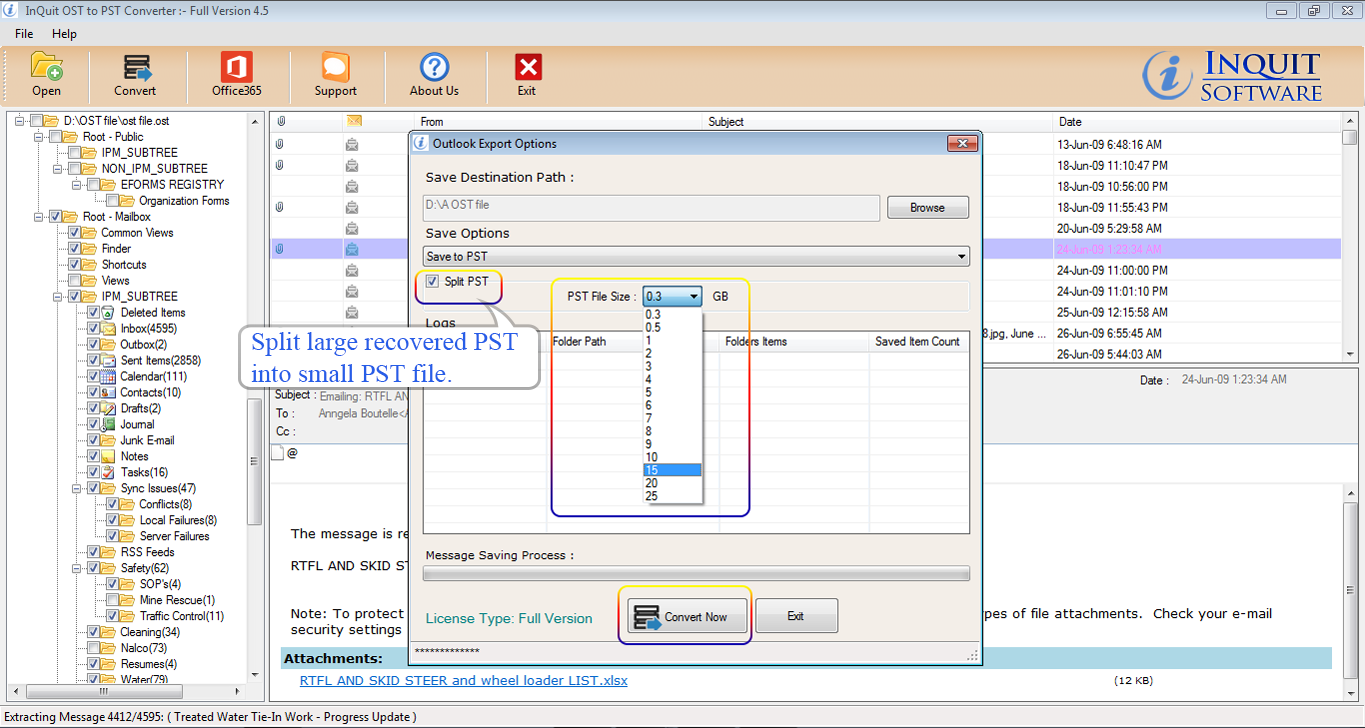
Split PST file option: Click the Split PSTcheckbox button and you can spilt the recovered large PST file into Small PST file.
Click on “Convert Now” button and start the conversion process.
Start the conversion process for OST to PST.
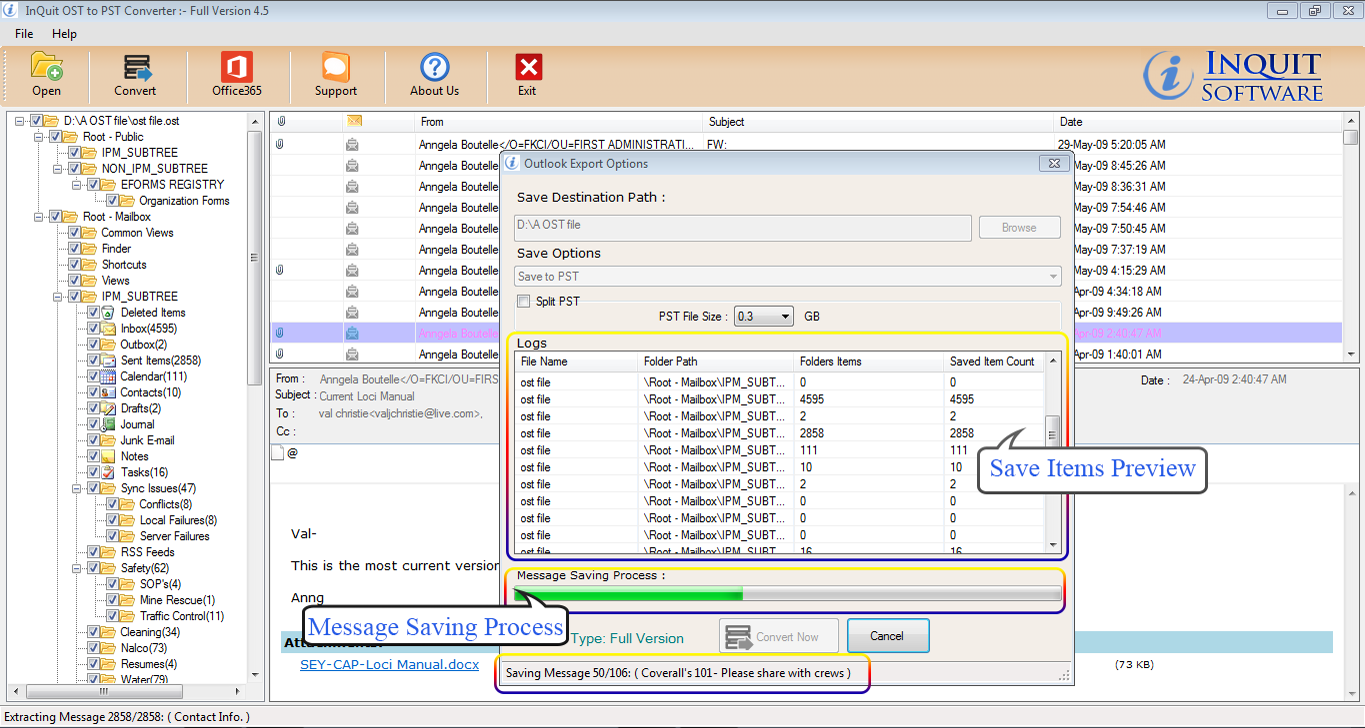
Complete OST to PST Conversion Process

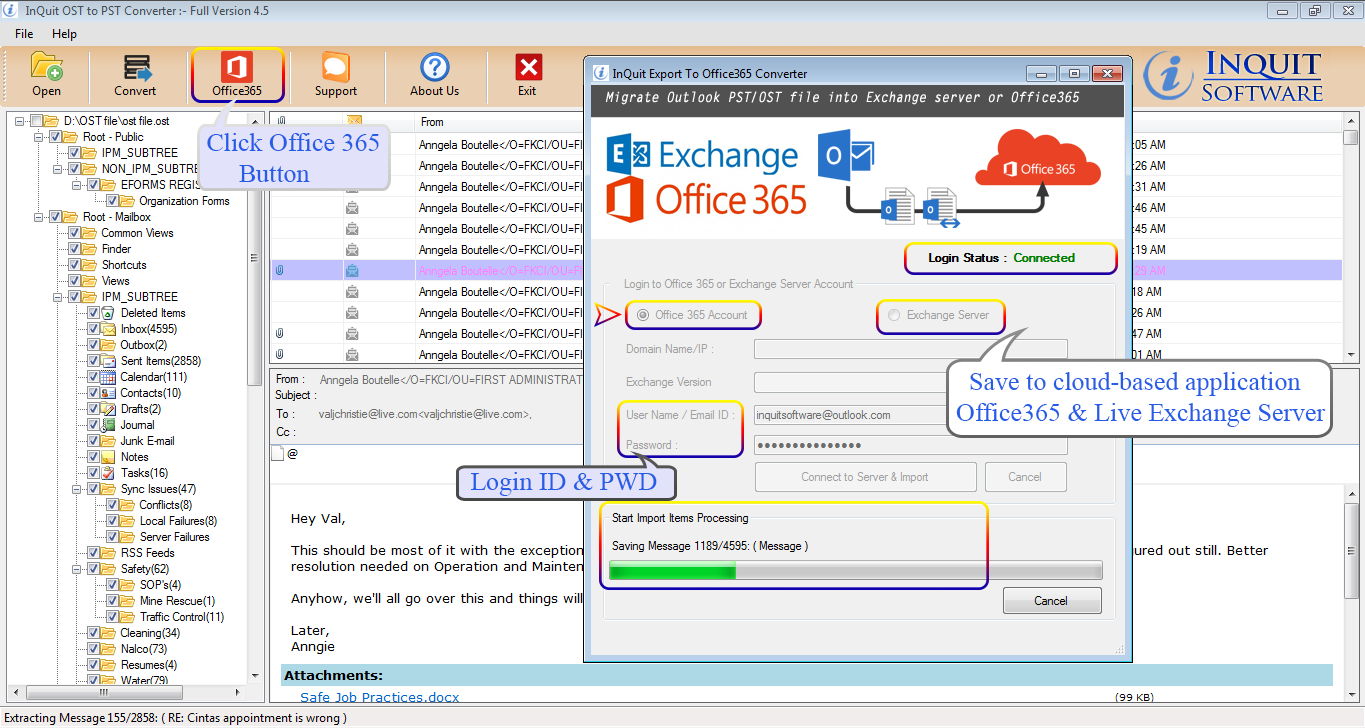
STEPS- Export OST to Office 365 and Live Exchange Server
User Name/ Email ID: “Office365” button from menu
Password: “Office365” button from menu
Now, click on "Connect to Server & Import" button for connecting to Office 365 A/c.
Our Trusted Customer's
Here are the 13+ million customer of our Products.